Categories:
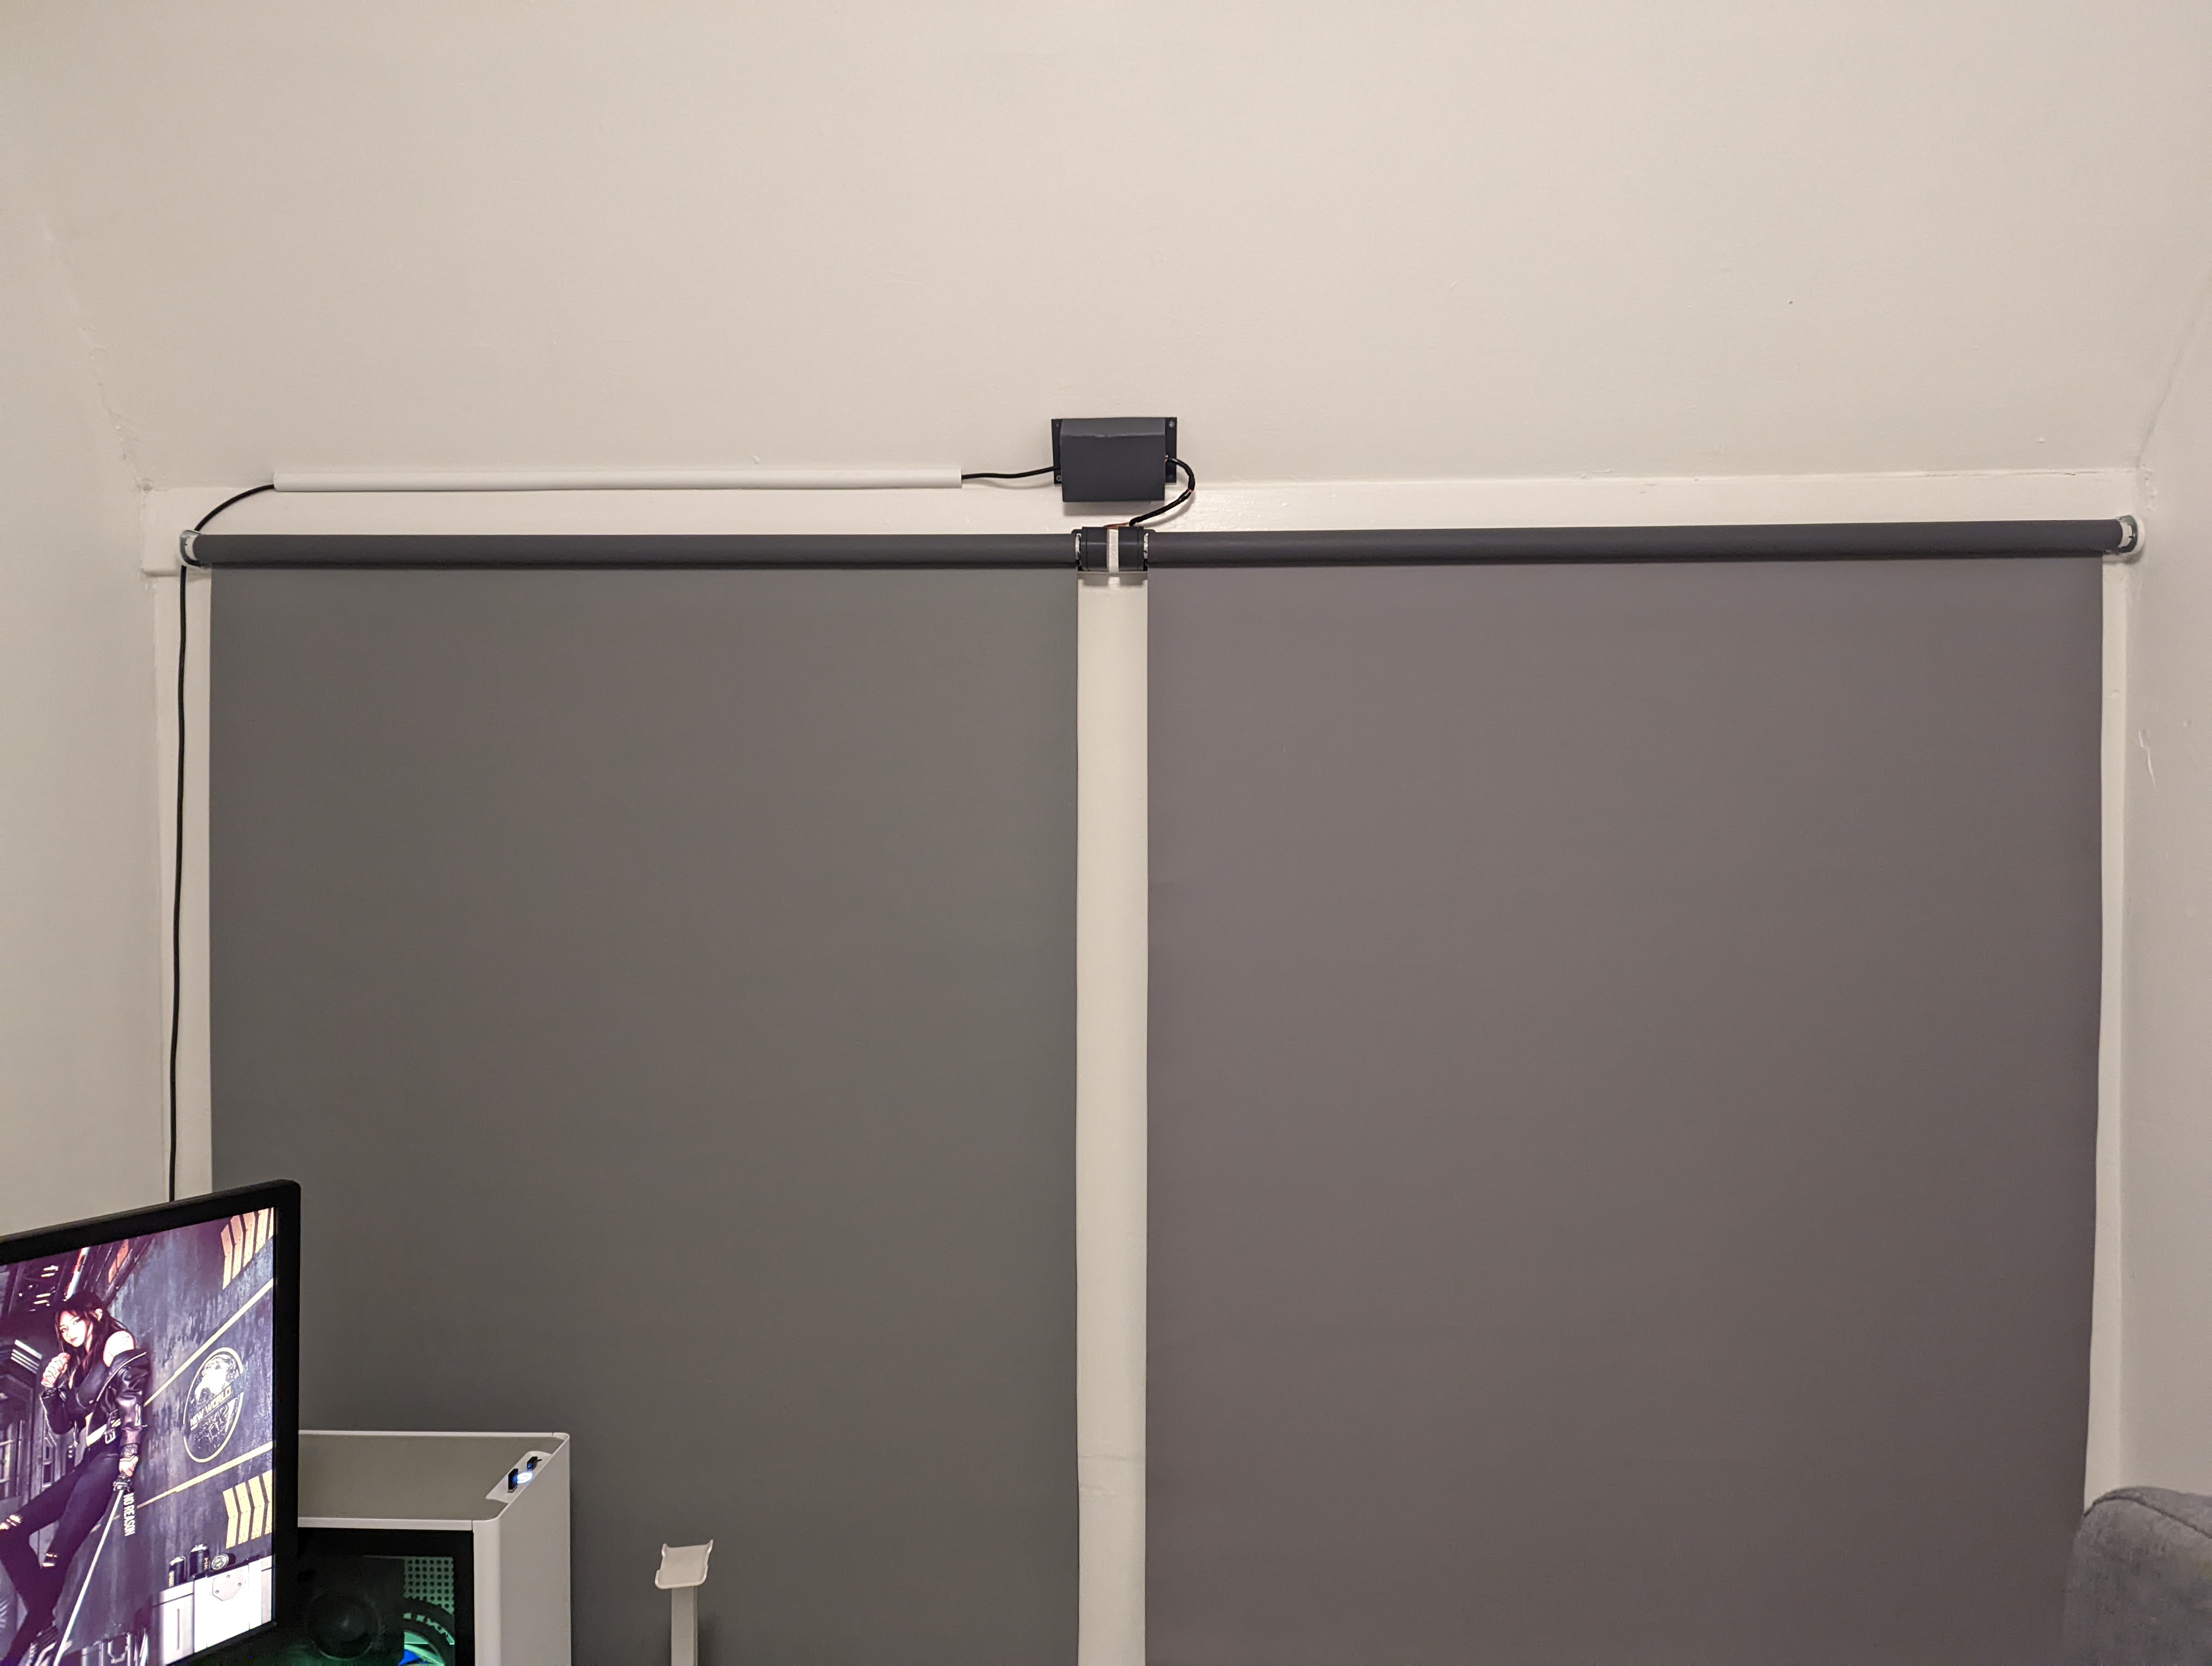
Since I moved (in 2020), I have been expanding my smart-home setup. One of the things I wanted to automate is the blinds I have in my house. So last week, I shared the progress of this idea on Twitter and the resulting video of automating the blinds in my home office.
Now I want to share with you how I achieved this, so you might replicate this. I have a bunch of IKEA Tupplyur (aka Tupplur) blinds. However, I think this will most likely work with any blinds that share the same diameter.
Bill of Materials
What will need is the following
- IKEA Tupplyur (or compatible) blinds
- 3D printed brackets (Thanks Martinengstrom @ Thingiverse! 🙏)
- NodeMCU V3 dev board
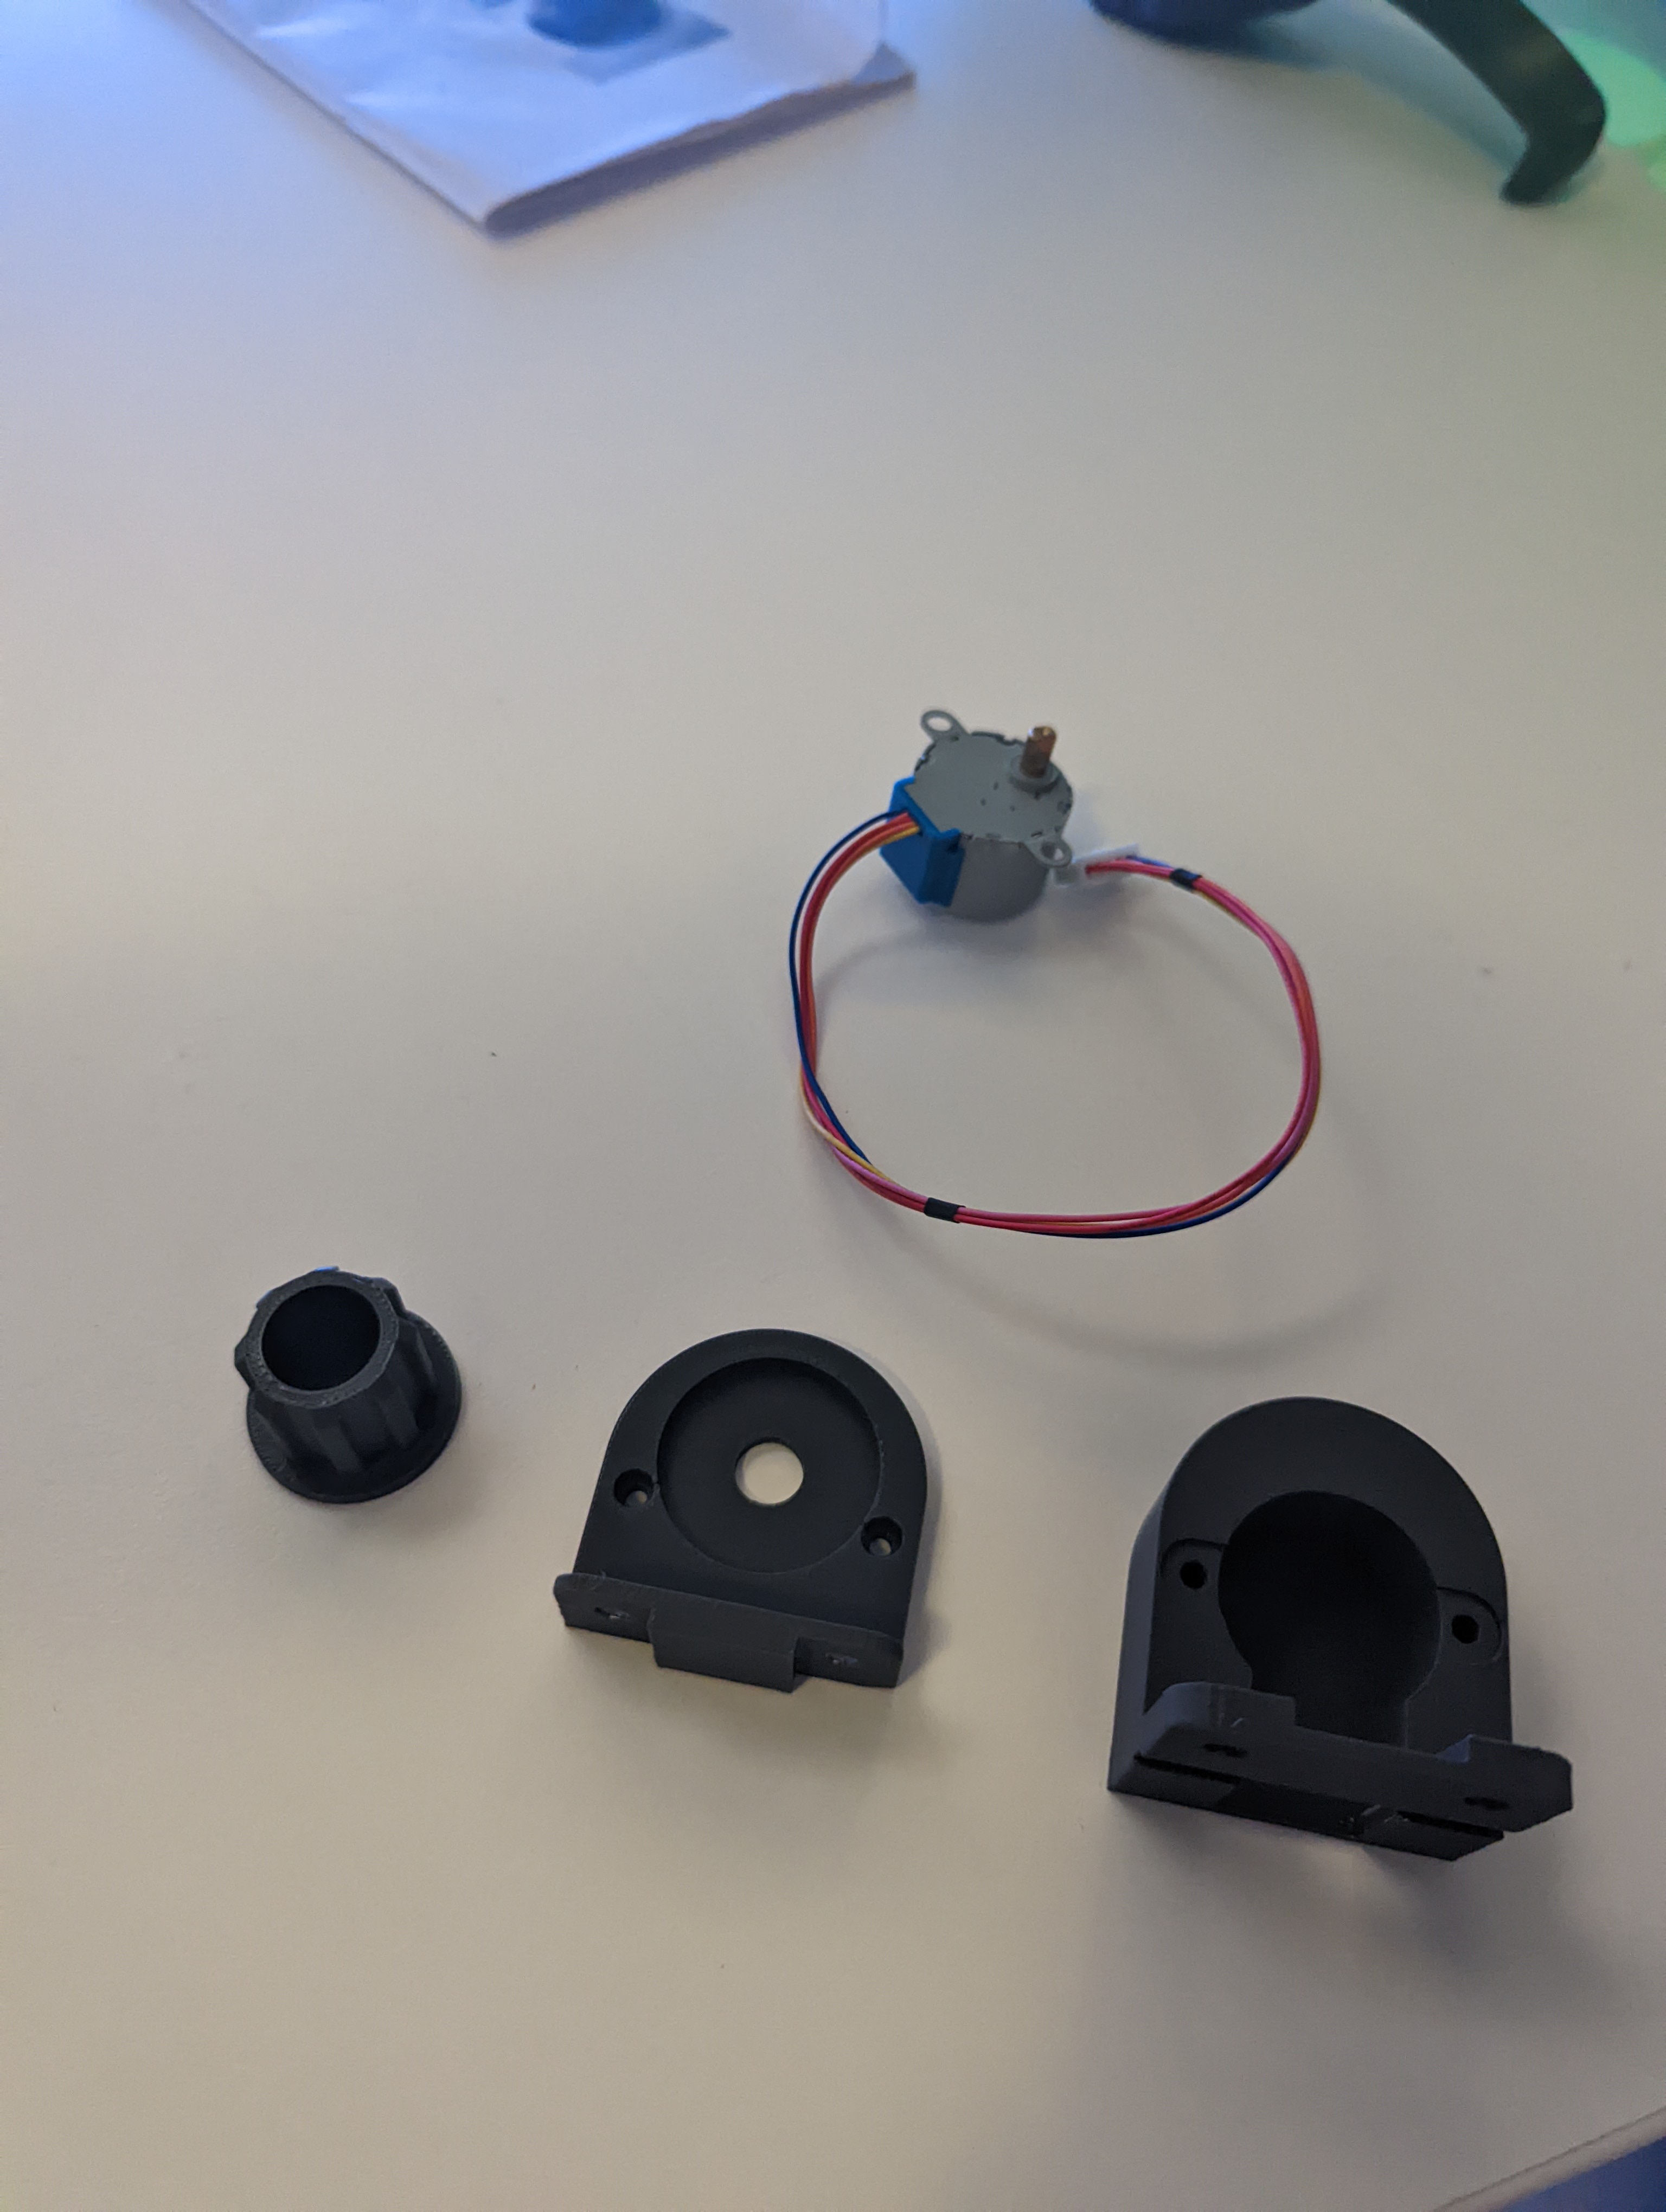
- 1 28BYJ-48 motor(s) with driver board (per blind, you want to automate)
- A power supply (I repurposed an old, 9V 600 mAh power supply)
- Optional project box to house everything.
- And maybe some additional components for properly powering the motors.
Total costs: About 15 euro (10 euro for the 3D printed parts, 5 euro for the two motors including driver boards and 5 euro’s for the NodeMCU V3 dev board).
Printing the stuff
So once you have 3D printed the brackets, you should have the following parts.
- The insert that goes into the tube
- The base in which the motor falls into
- A cover that ties everything together.
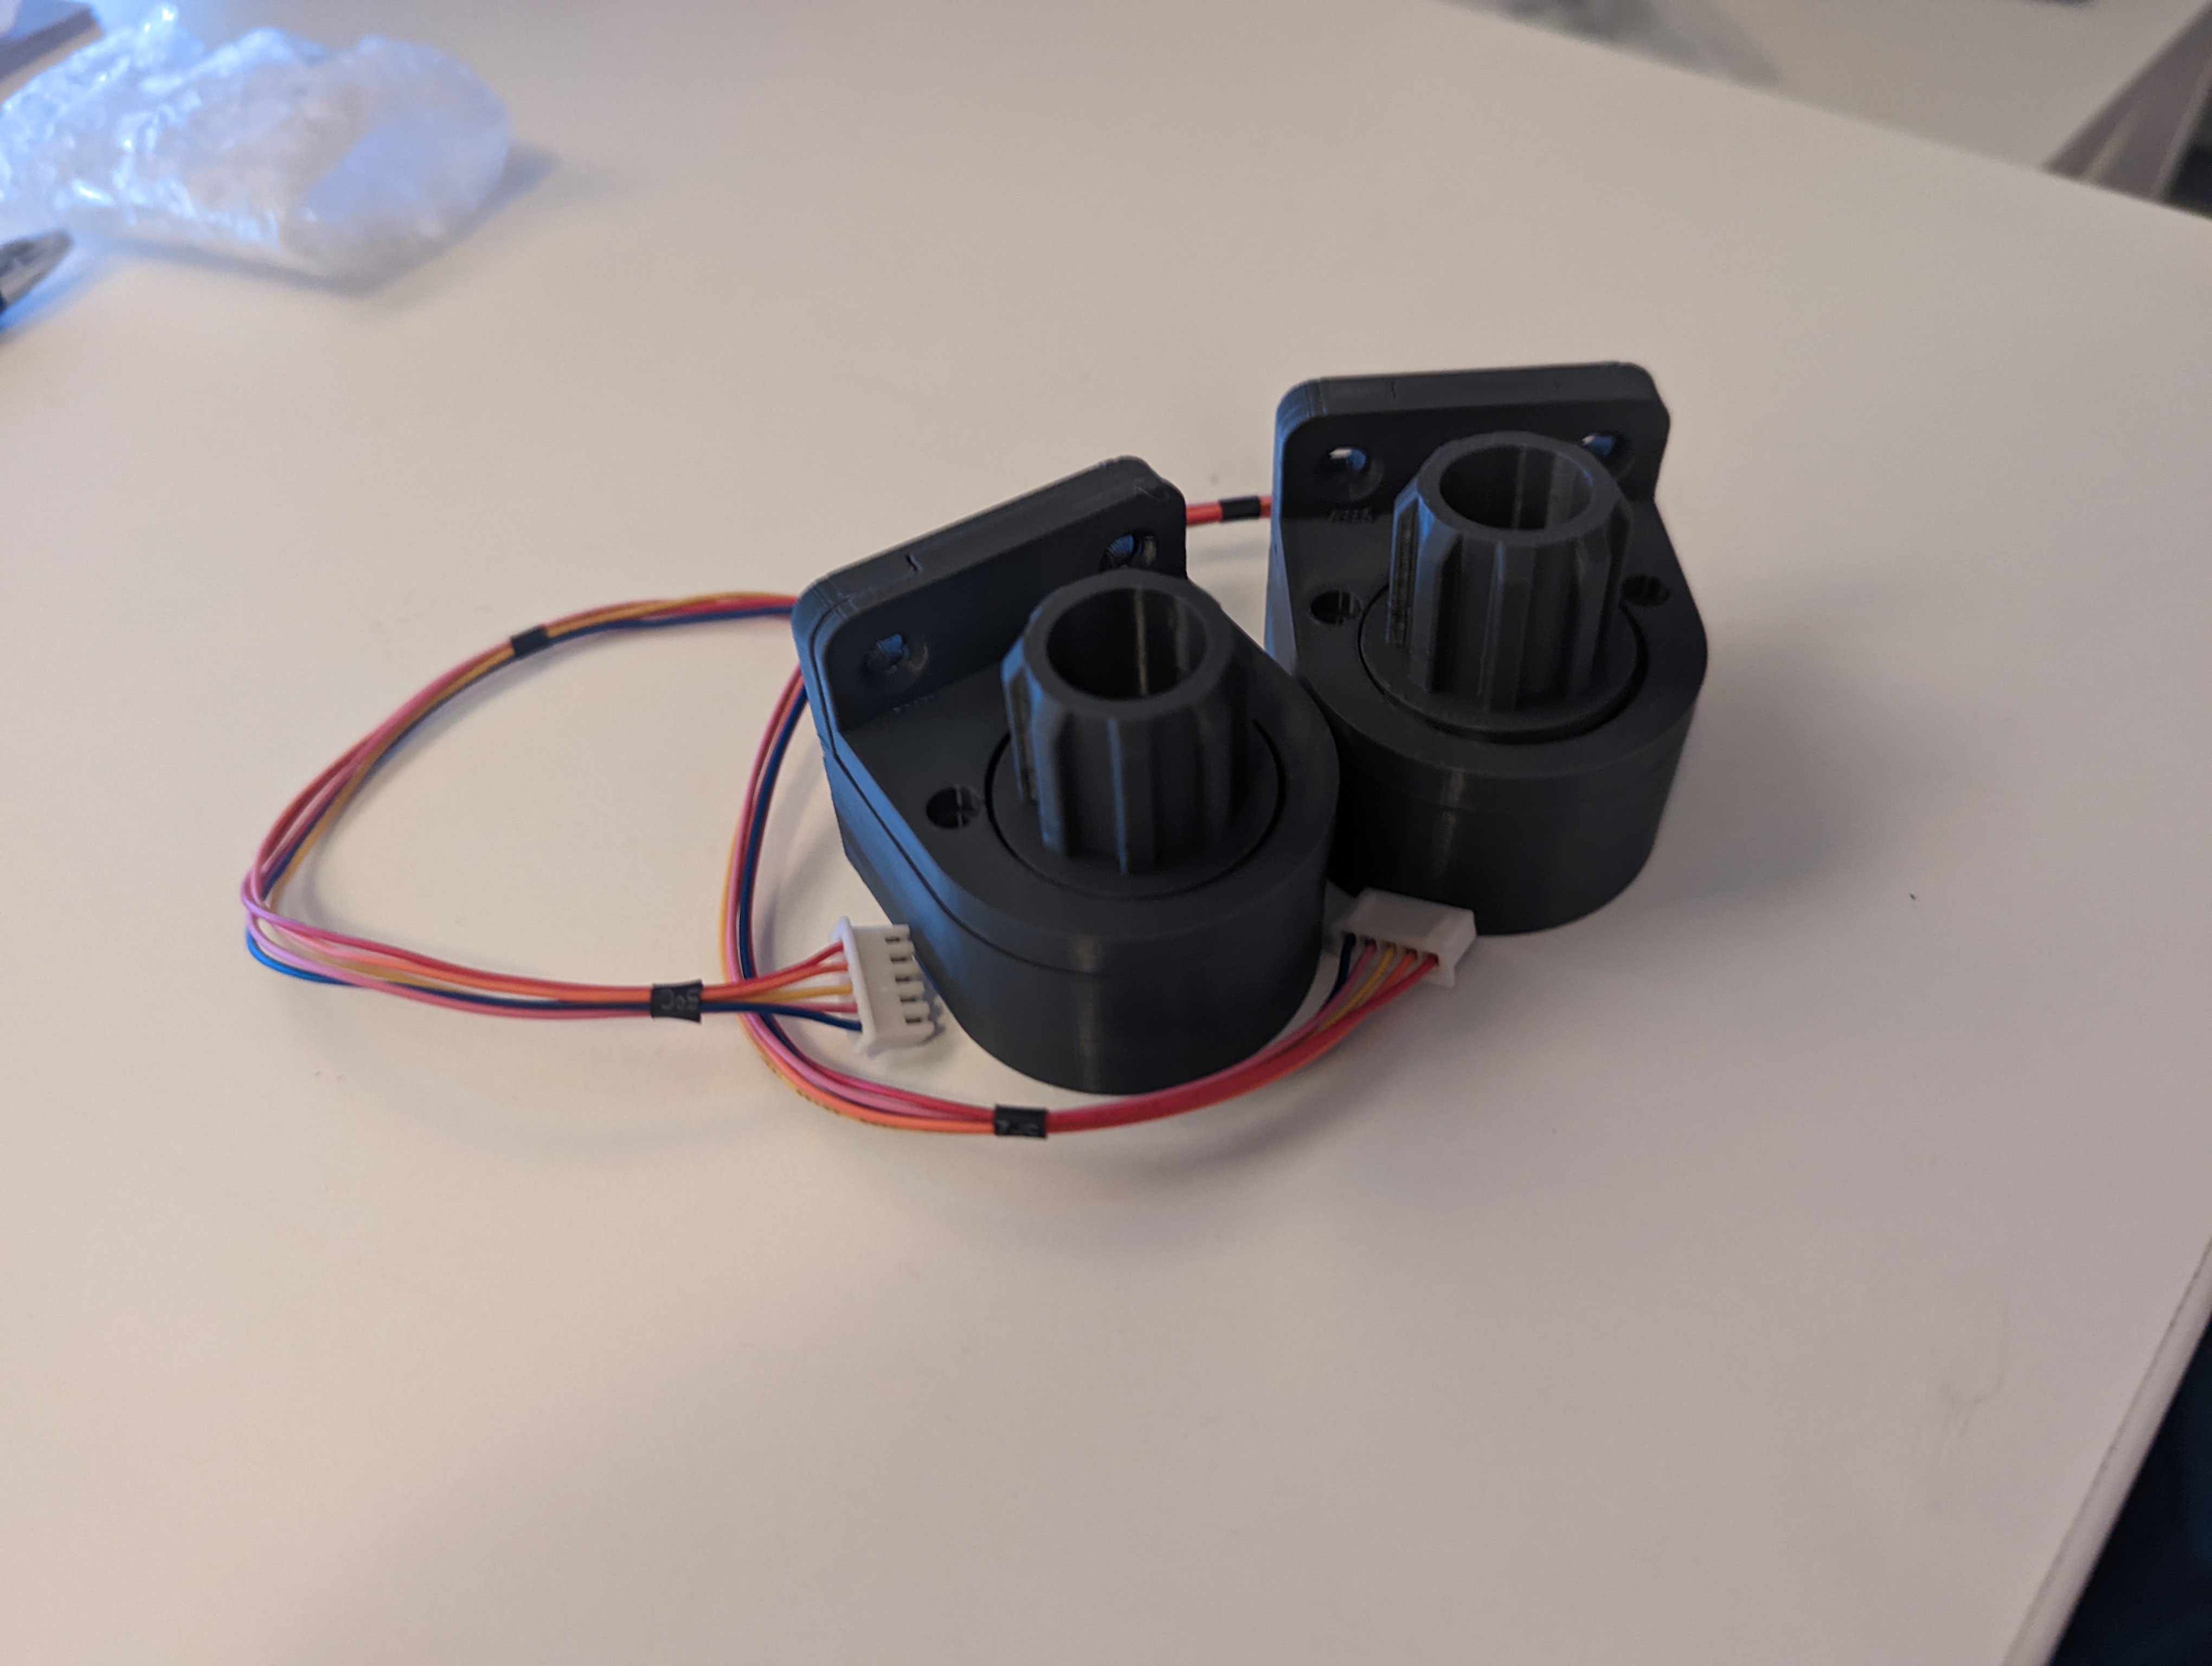
And assembled, it should look something like this:
Assembly
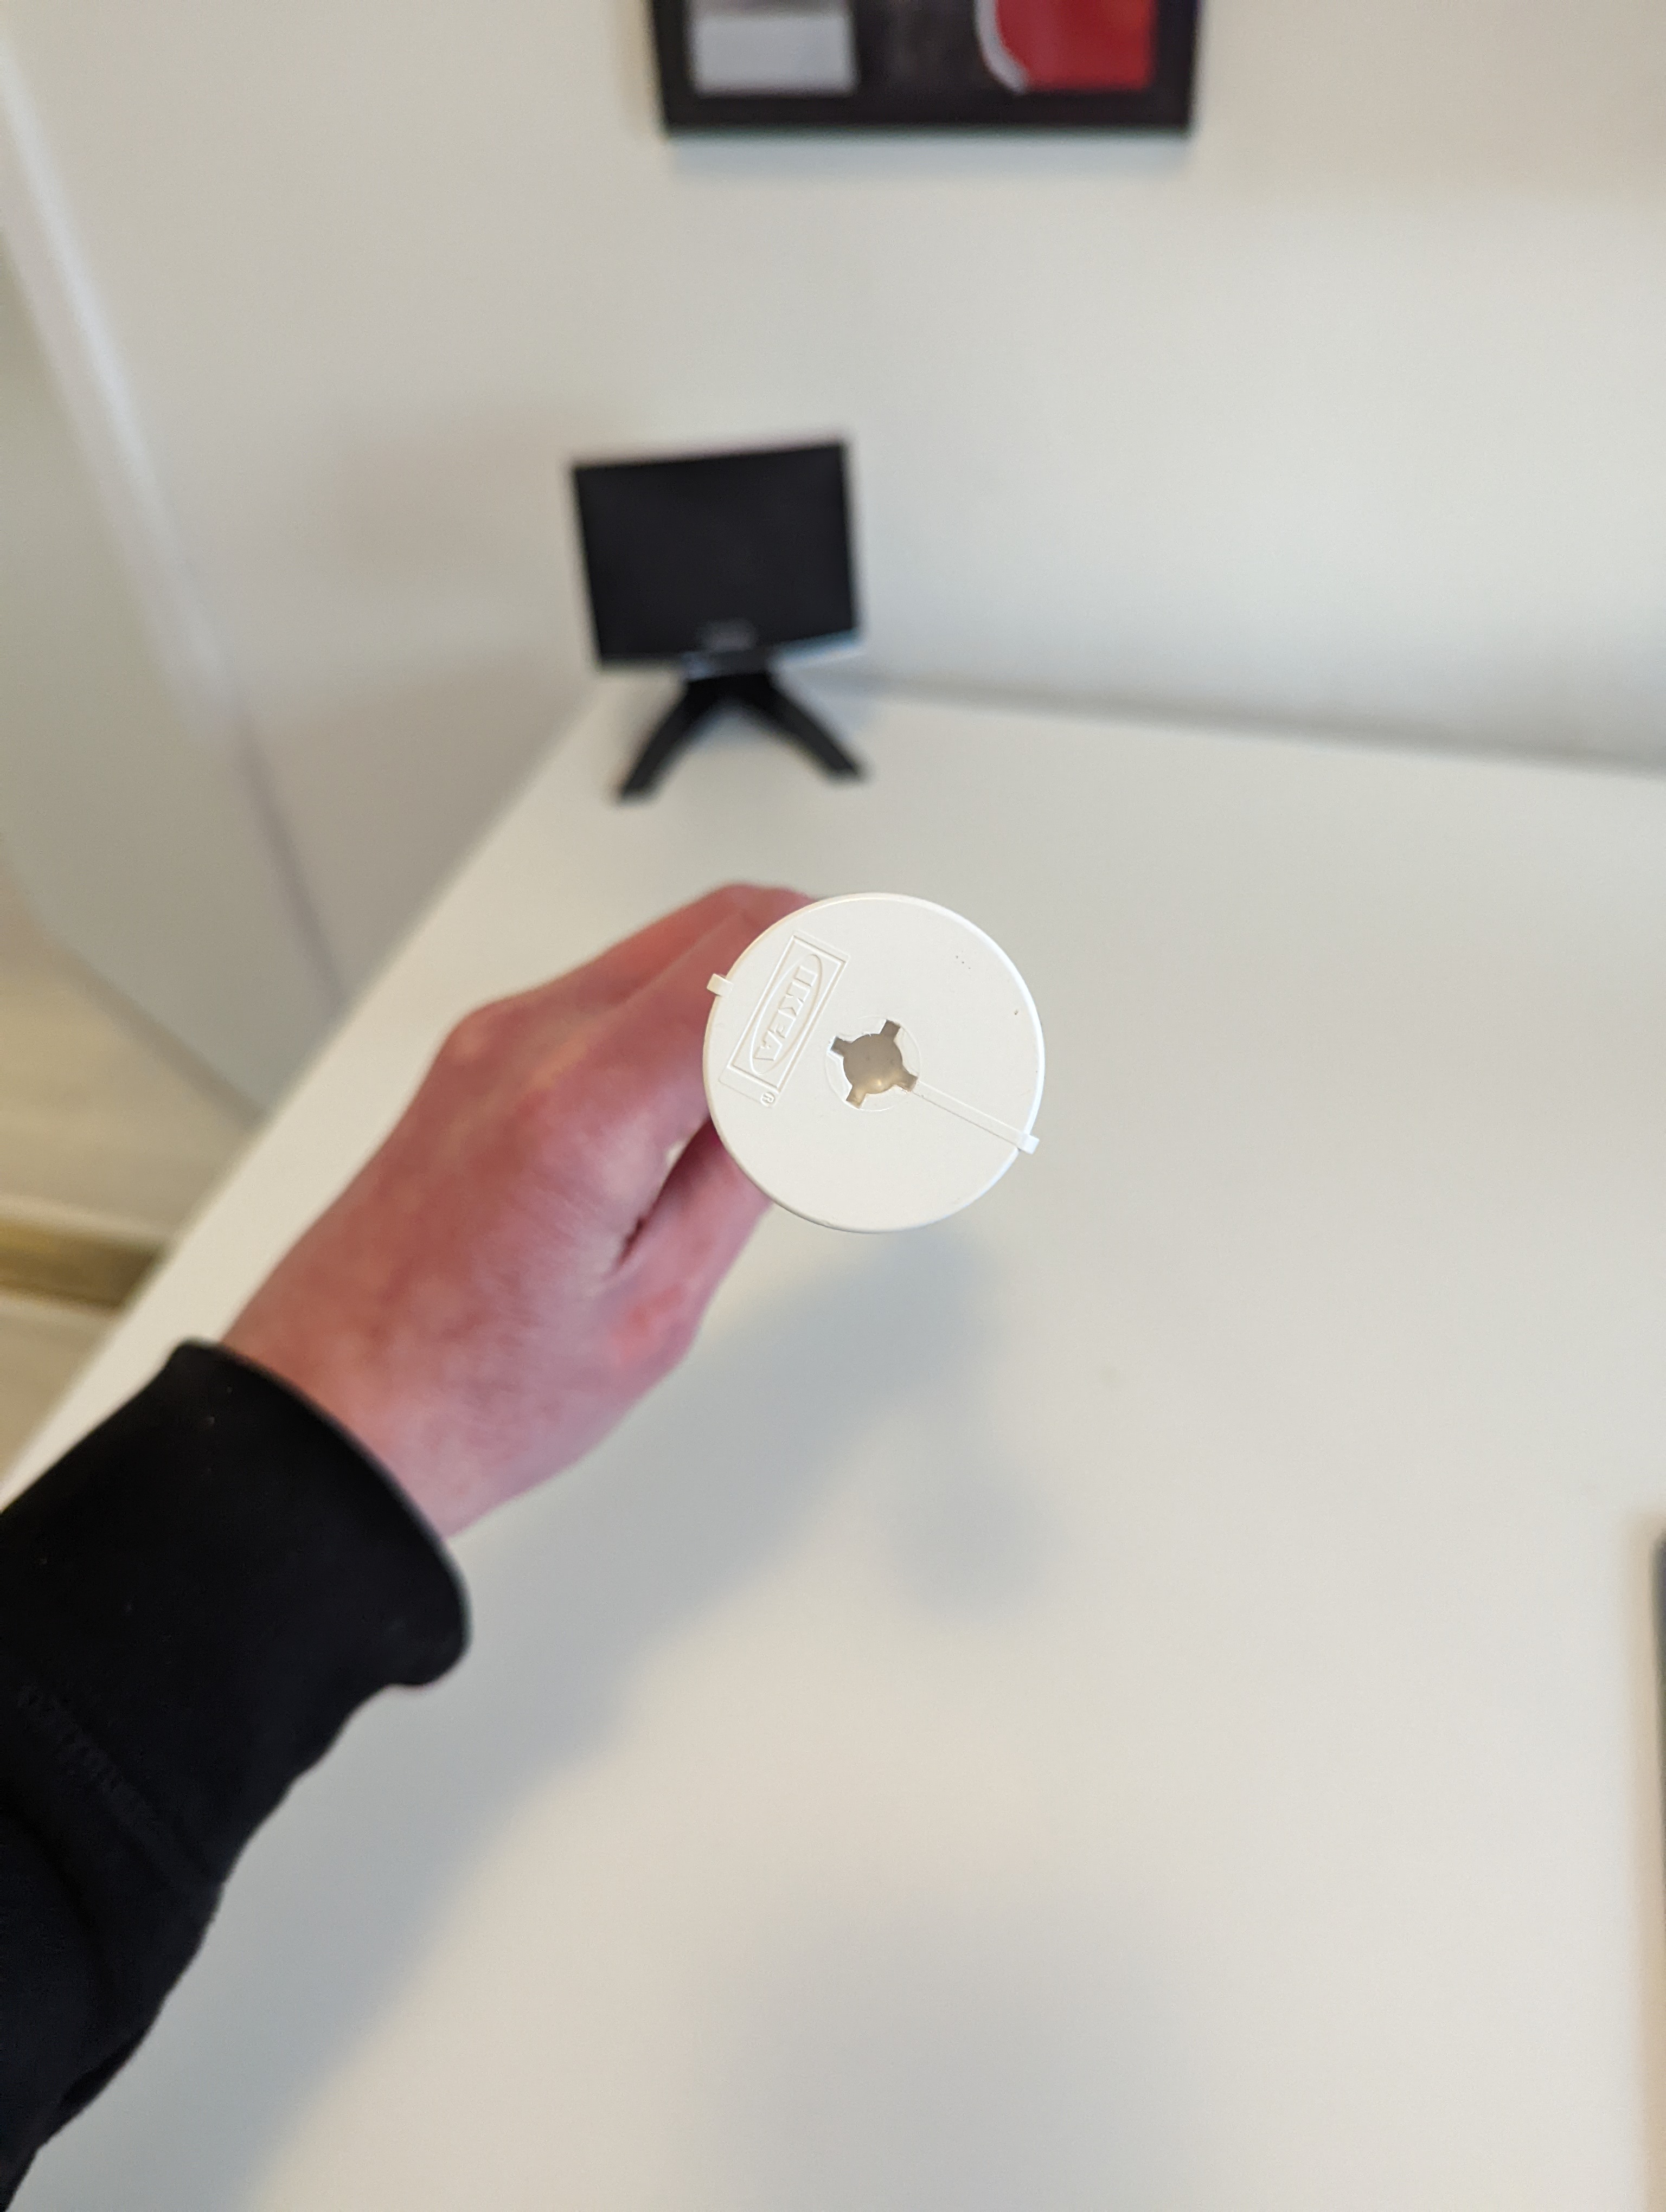
On the IKEA Tupplyur blinds there is one side with a self (un-)locking mechanism, that’s the side you want to replace with your 3D printed parts. I do not have any picture of the assembly process, but the side that needs to be replaced looks like this:
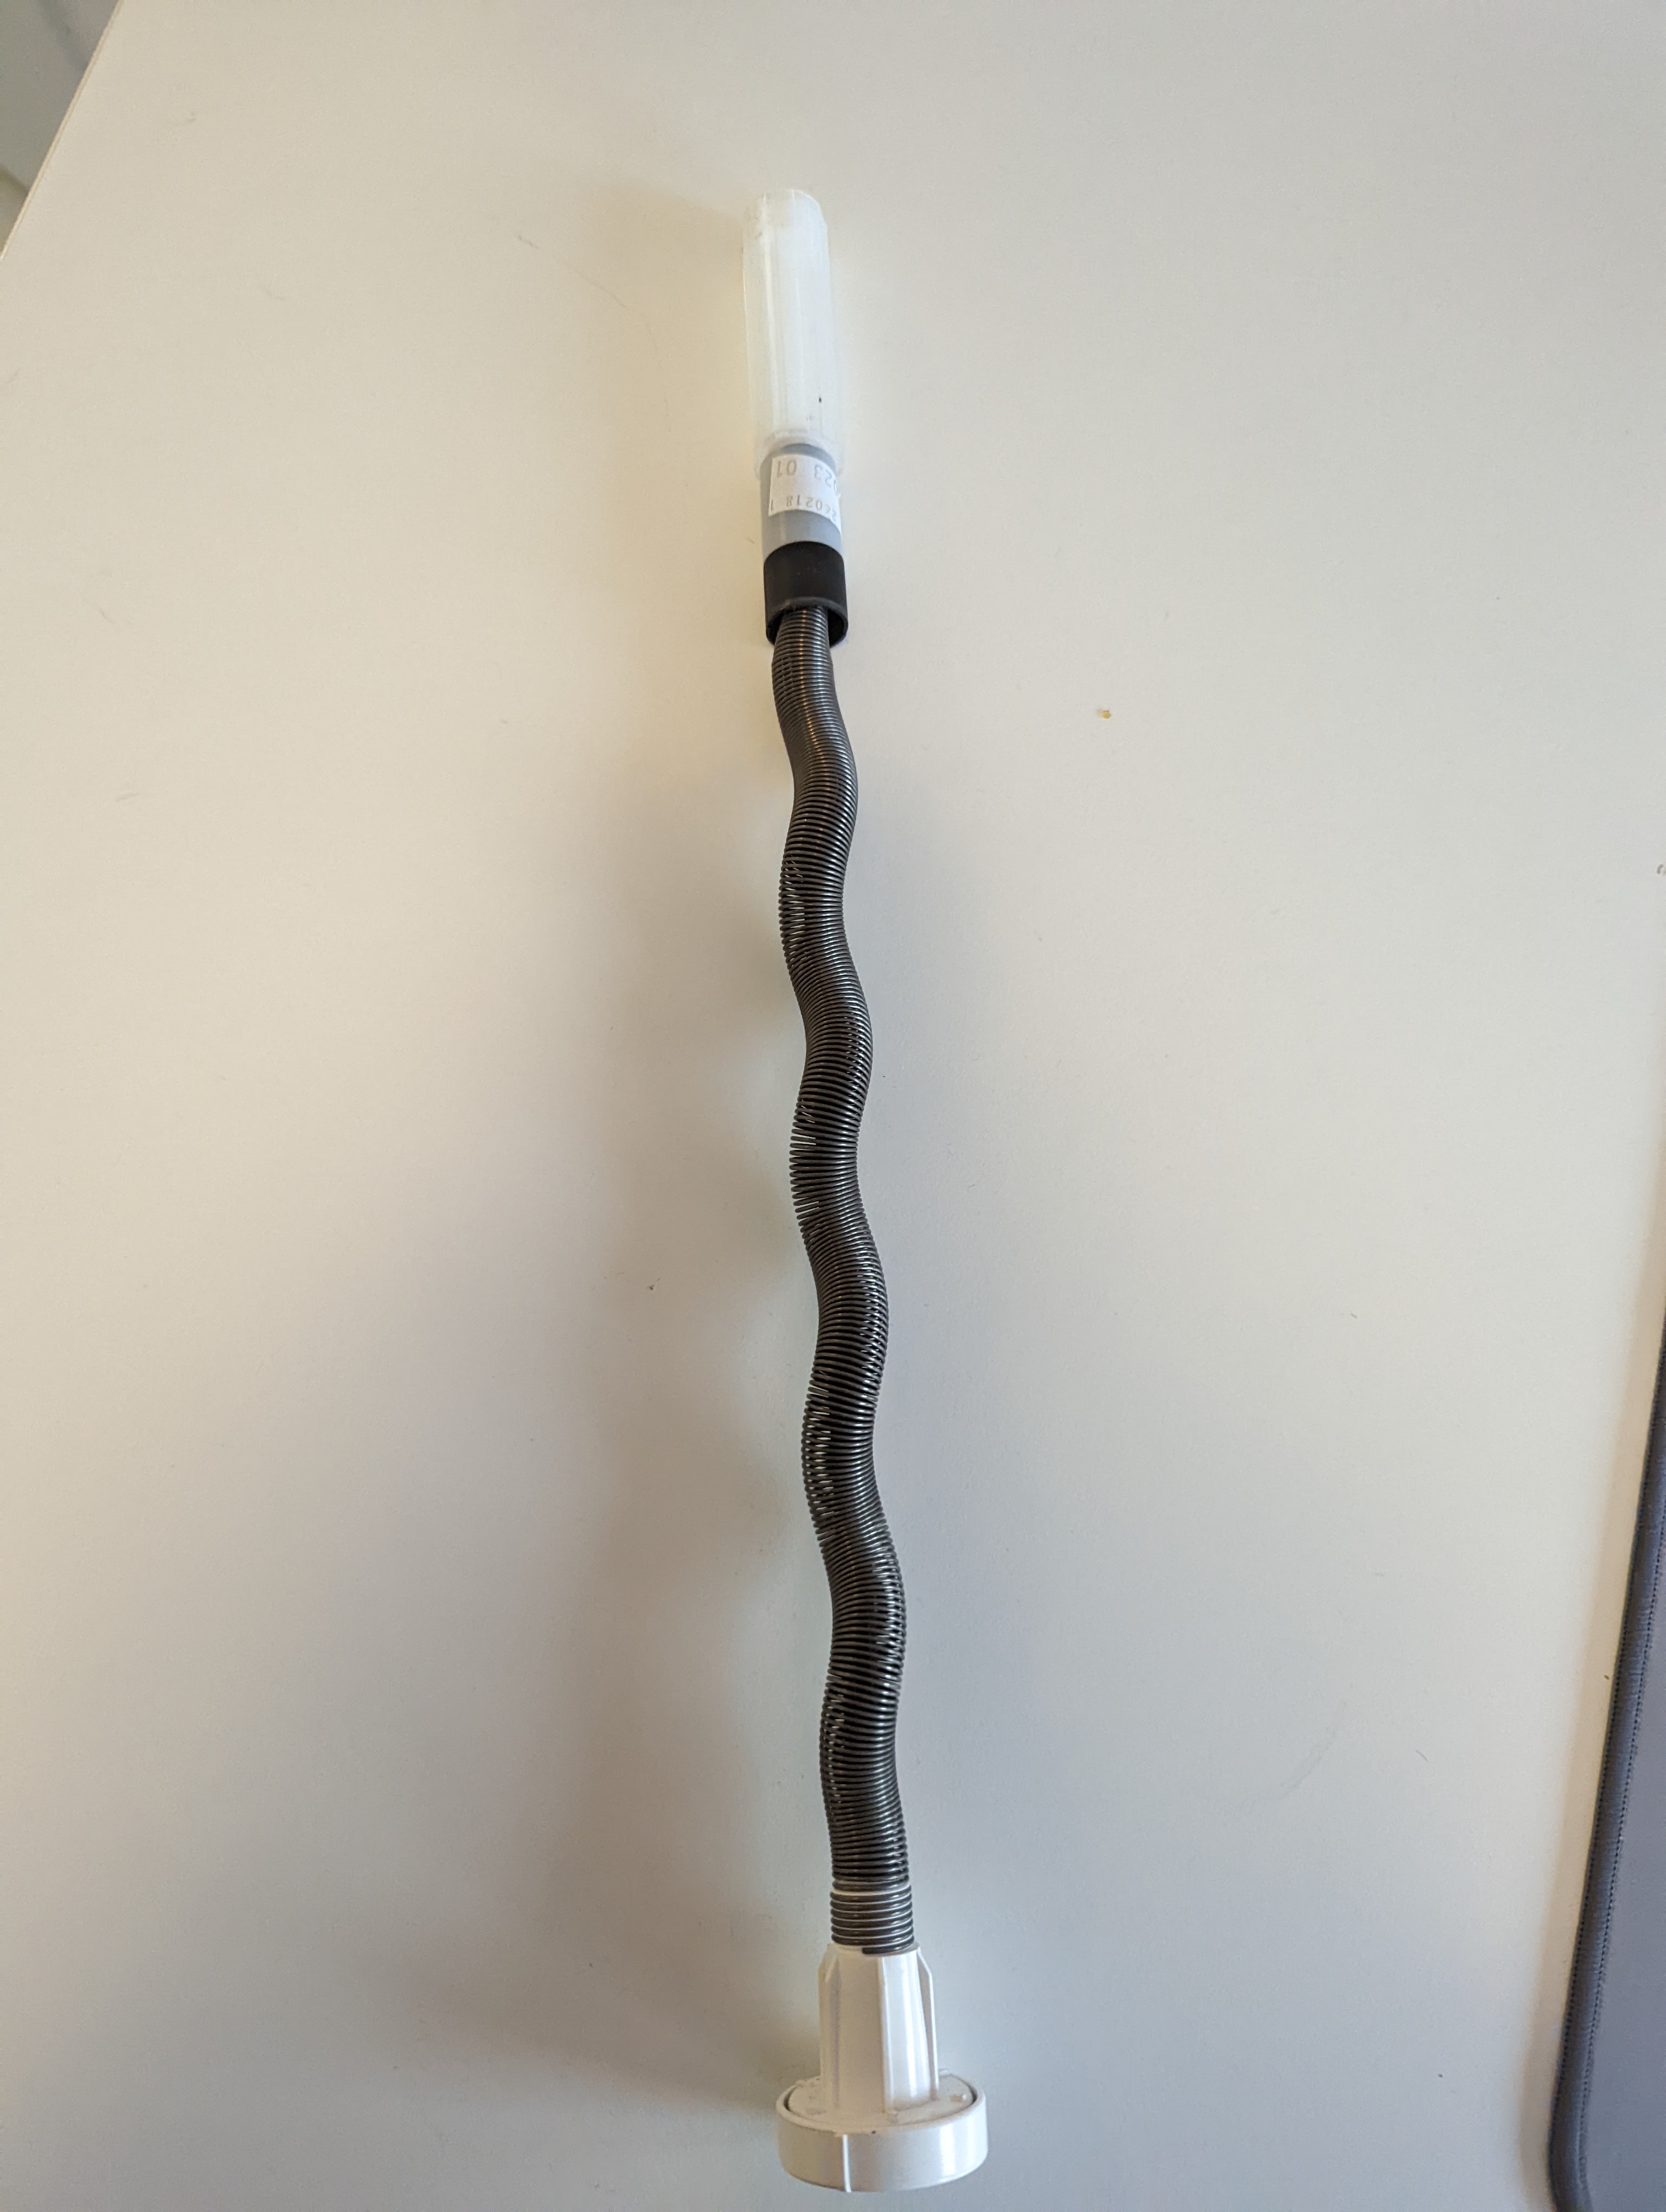
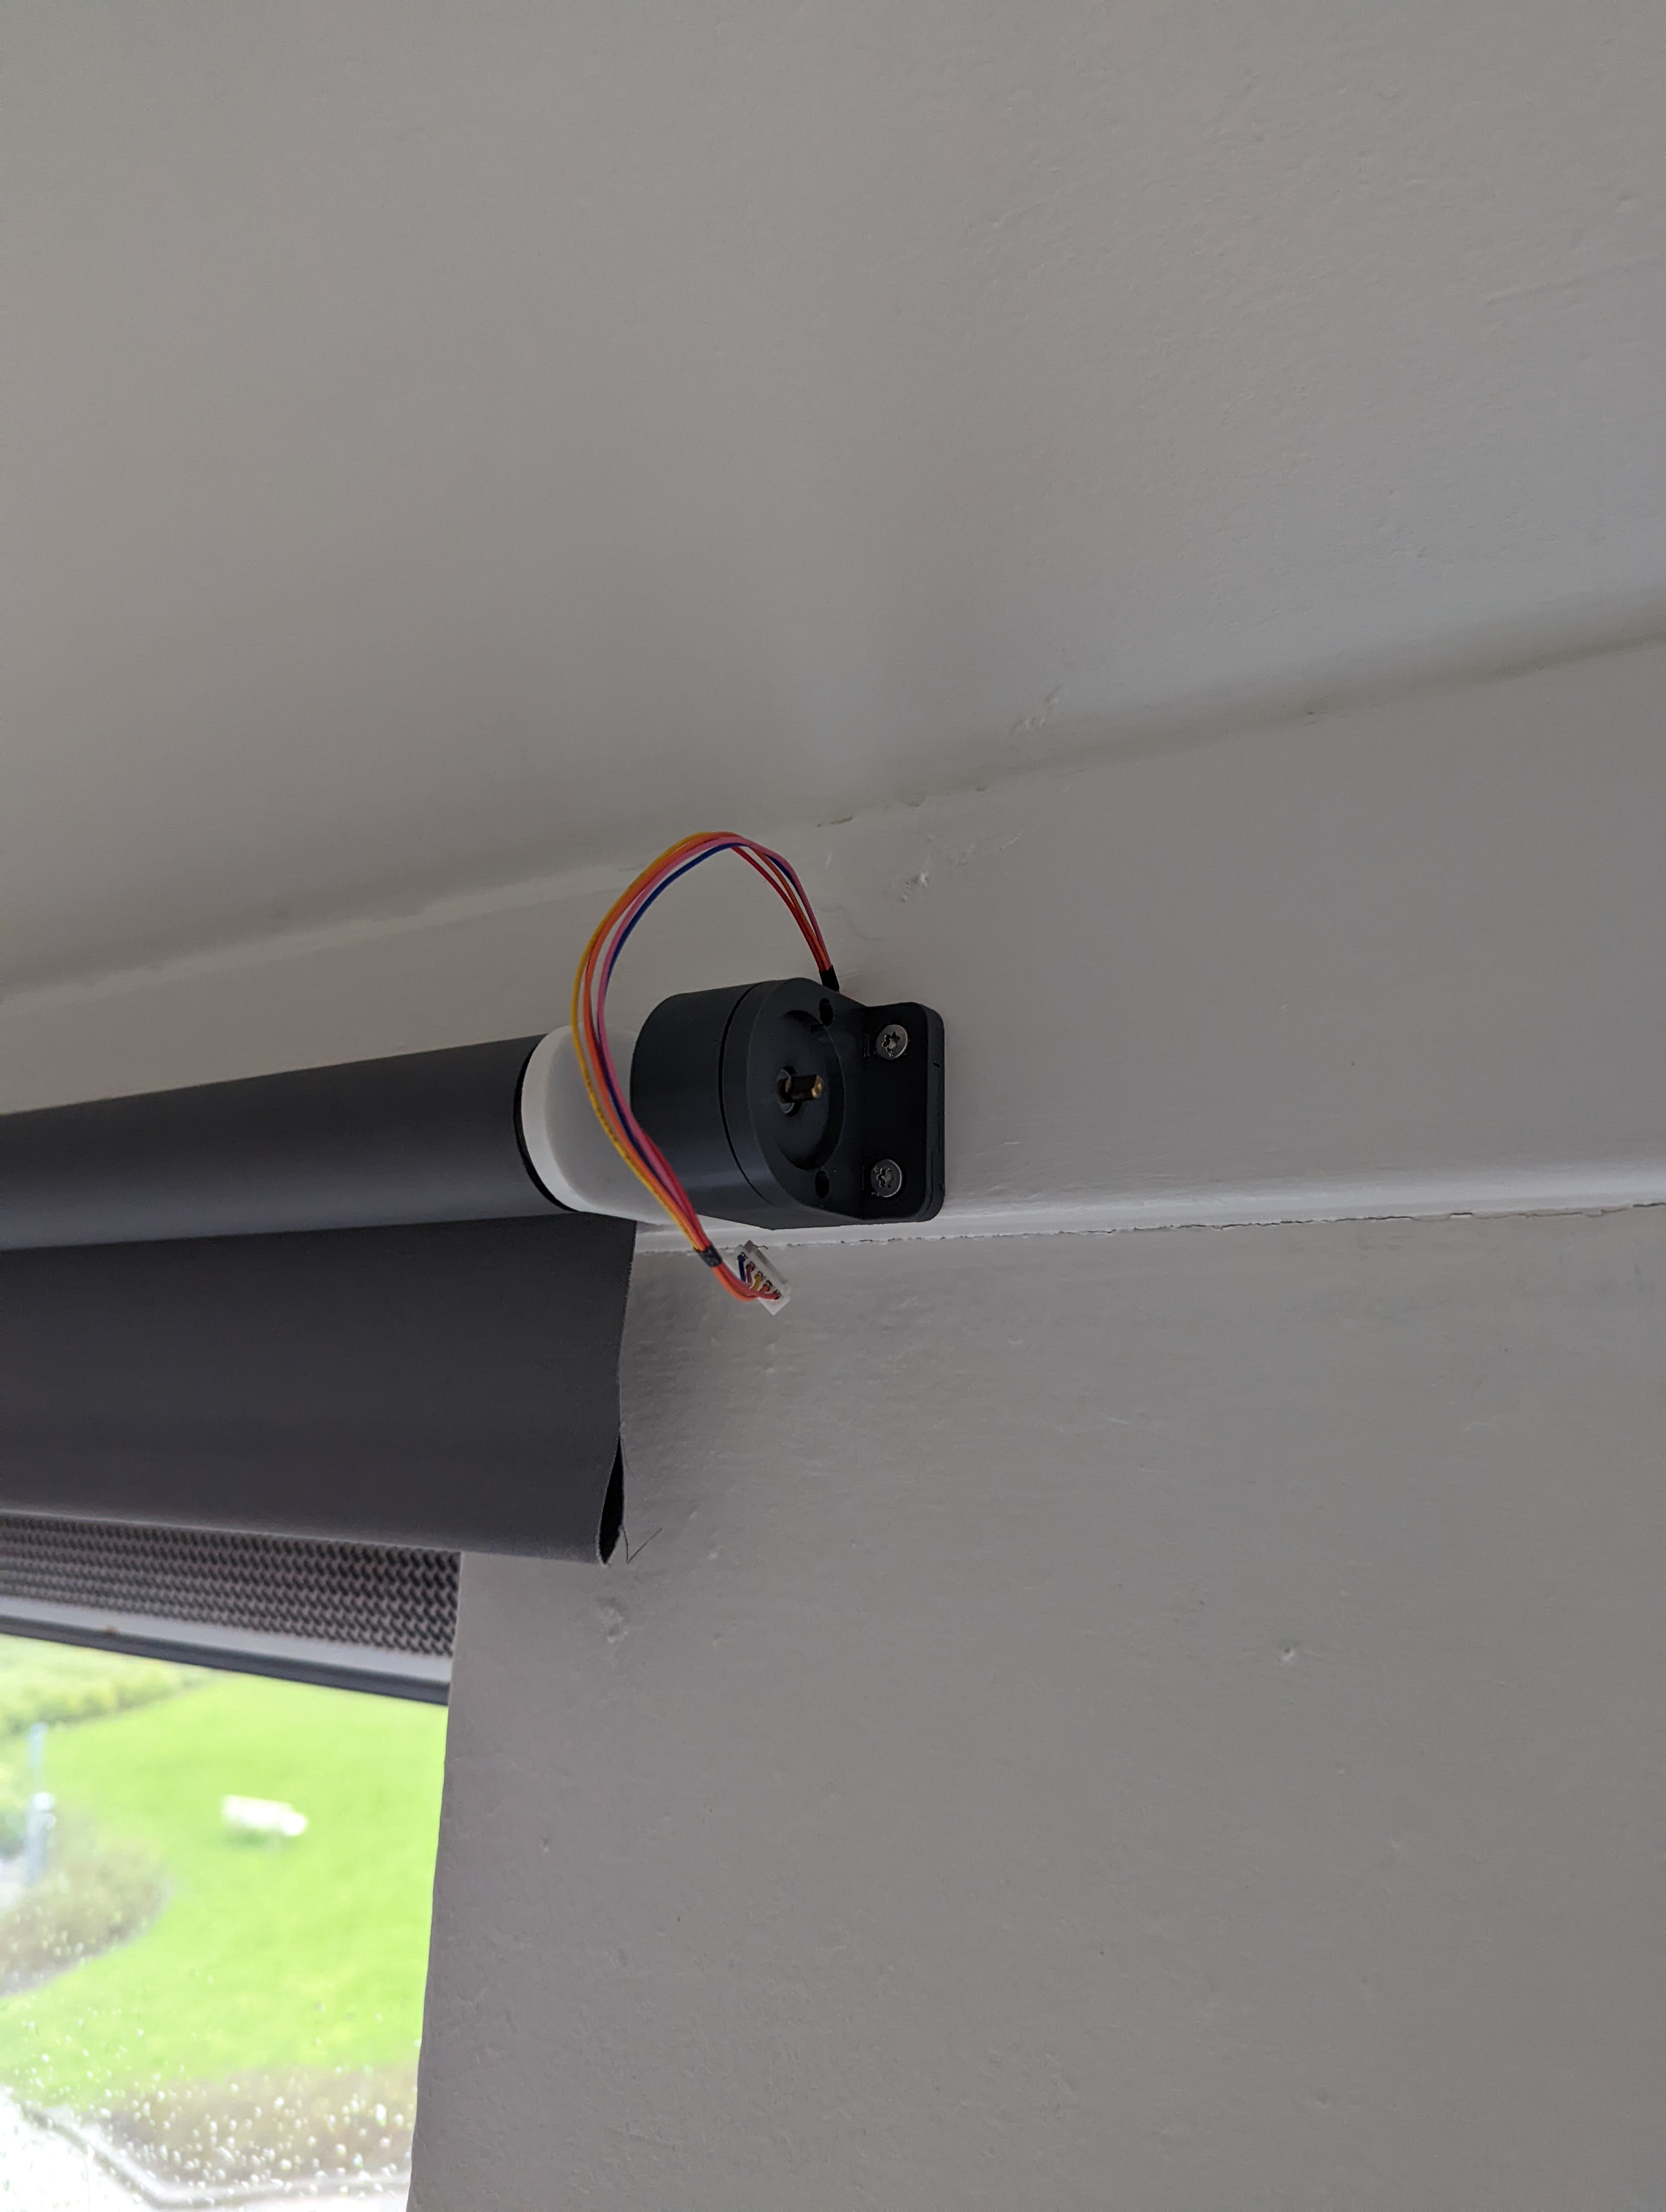
Once you replace the (un)locking mechanism inside the rod, it’s time to mount the 3D printed bracket to replace the current bracket in which the (un)locking mechanism sits.
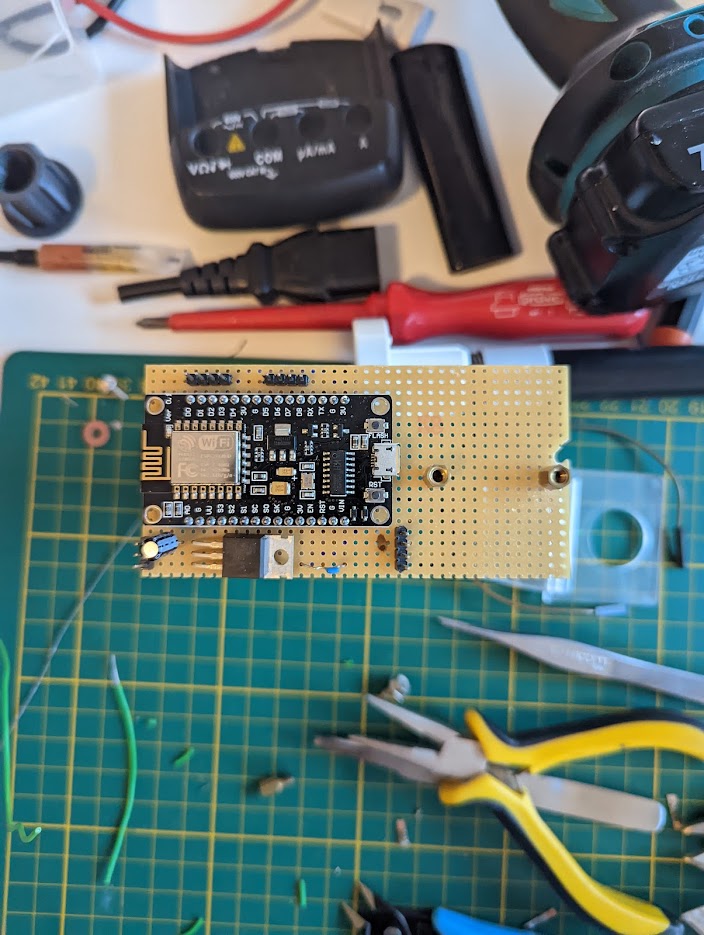
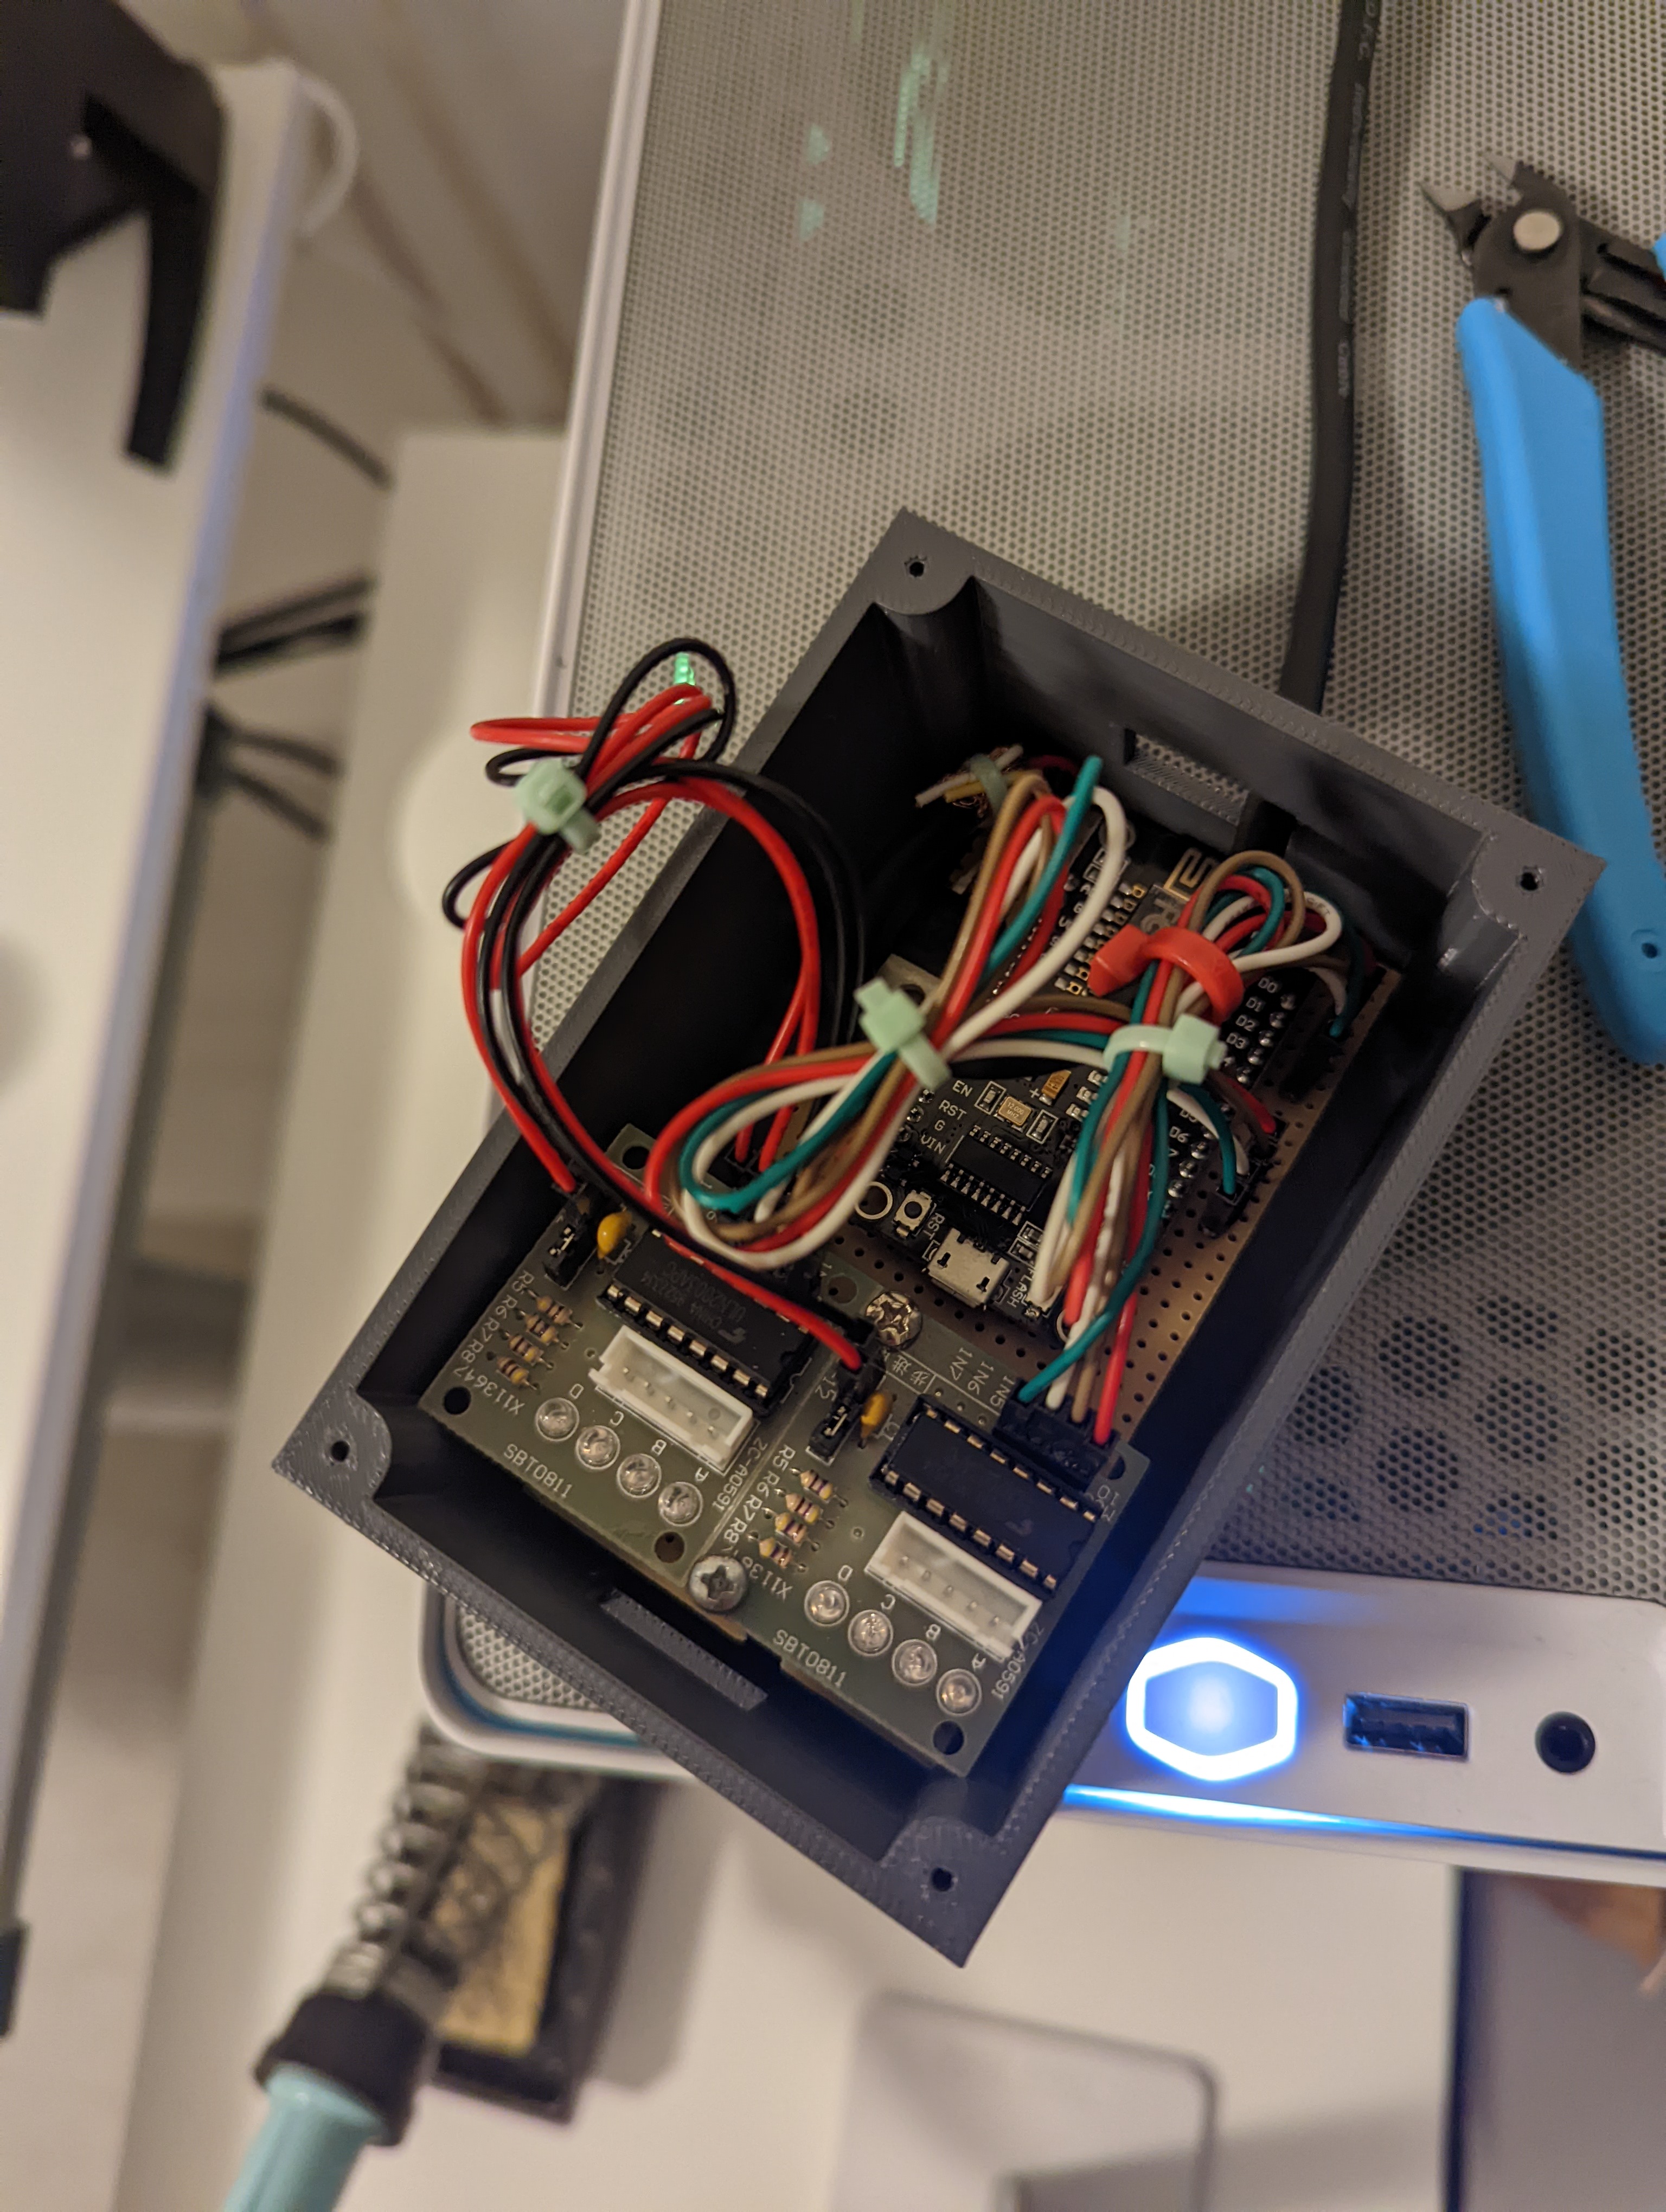
Because I am using a custom power supply, I needed to build a little proto-board to power everything. This isn’t anything too fancy, it mainly consists of a TS7805 (to power the NodeMCU board) and to connect the NodeMCU to the driver boards of the 28BYJ-48 motors.
I used D0, D1, D2, and D3 for the right blind and D5, D6, D7, and D8 for the left blind.
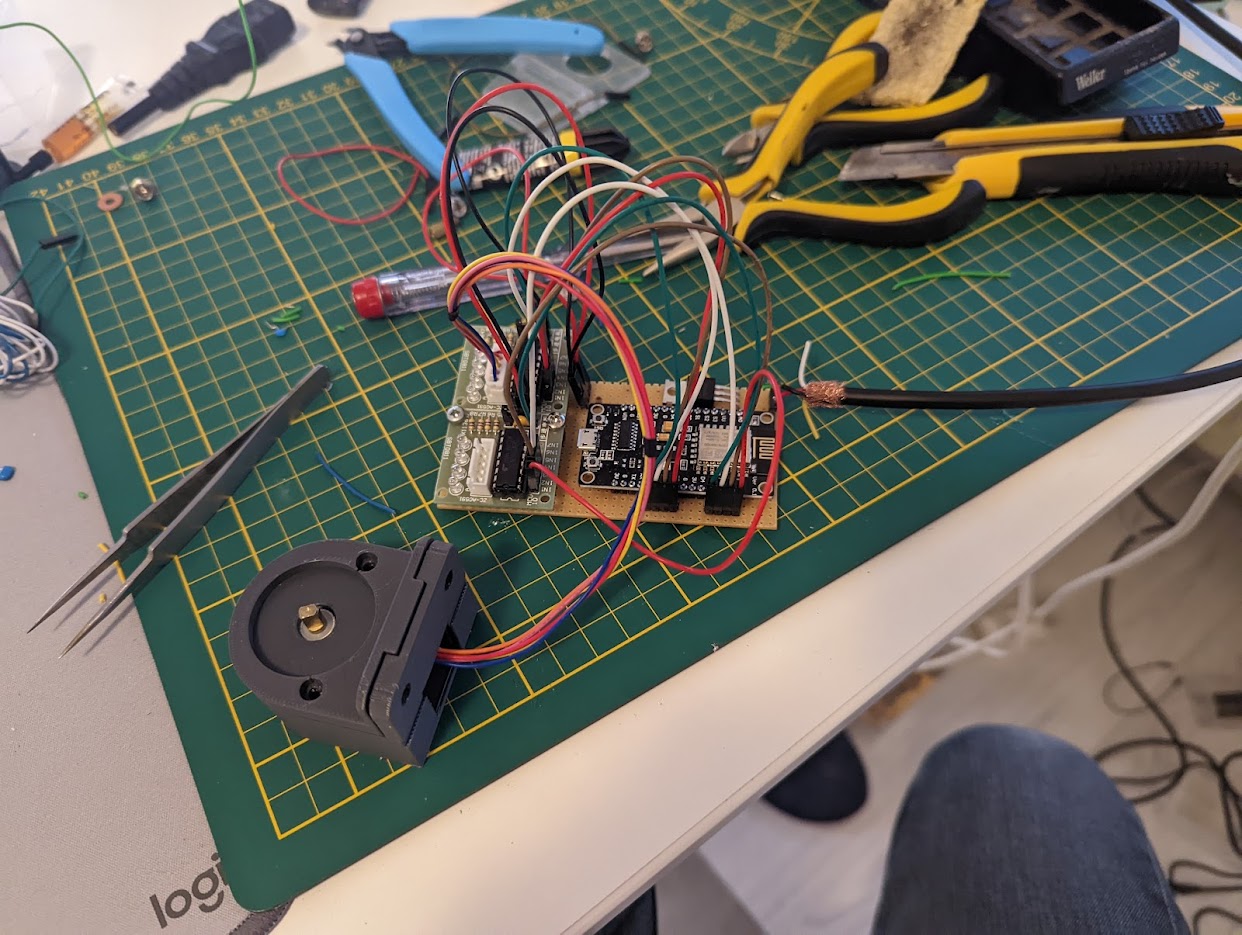
Once everything was assembled, I 3D printed a simple flange box (from Lightningboxes) that would fit everything, so I could wall mount it and not have electronics ‘flapping around in the breeze’, so to speak 😜
This is how it looks on the inside.
ESPHome setup
Now that assembly is done, it’s time to set up everything. This is my ESPHome setup for the NodeMCU. If you do not know how to flash ESPHome onto a NodeMCU, I highly recommend an article by Pieter Brinkman that explains how you can flash ESPHome on a NodeMCU (or any ESP32 / ESP8266 based) device.
esphome:
  name: curtains-homeoffice

esp8266:
  board: nodemcuv2

# Enable logging
logger:

# Enable Home Assistant API
api:
  password: !secret ha_api_password
  services:
    - service: control_stepper
      variables:
        target: int
      then:
        - stepper.set_target:
            id: right
            target: !lambda 'return target;'
    - service: control_stepper
      variables:
        target: int
      then:
        - stepper.set_target:
            id: left
            target: !lambda 'return target;'

ota:
  password: !secret ota_password

wifi:
  ssid: !secret wifi_ssid
  password: !secret wifi_passwd

  # Enable fallback hotspot (captive portal) in case wifi connection fails
  ap:
    ssid: "Curtains-Homeoffice"
    password: !secret hotspot_password

captive_portal:

cover:
  - platform: template
    name: "Curtain right"
    id: curtain_right

    open_action:
      - stepper.set_target:
          id: right
          target: -21000 # The amount of steps need to roll up the blinds

    close_action:
      - stepper.set_target:
          id: right
          target: 21000 # The amount of steps needed to roll down the blinds (in my case, this is full closed)

    stop_action:
      - stepper.set_target:
          id: right
          target: !lambda return id(right).current_position;
    optimistic: true
  - platform: template
    name: "Curtain left"
    id: curtain_left

    open_action:
      - stepper.set_target:
          id: left
          target: 21000 # The amount of steps needed to roll down the blinds (in my case, this is full closed)

    close_action:
      - stepper.set_target:
          id: left
          target: -21000 # The amount of steps need to roll up the blinds

    stop_action:
      - stepper.set_target:
          id: left
          target: !lambda return id(left).current_position;
    optimistic: true

stepper:
  - platform: uln2003
    id: right
    pin_a: D0
    pin_b: D1
    pin_c: D2
    pin_d: D3
    max_speed: 250 steps/s
    sleep_when_done: true

    # Optional:
    acceleration: inf
    deceleration: inf
  - platform: uln2003
    id: left
    pin_a: D5
    pin_b: D6
    pin_c: D7
    pin_d: D8
    max_speed: 250 steps/s
    sleep_when_done: true

    # Optional:
    acceleration: inf
    deceleration: inf
Please note, the reason why my left blinds use a positive number for the open action, compared to the right blind is that the left blind motor is rotated 180 degrees.
HomeAssistant
Once you’ve flashed the binary for the blinds to your NodeMCU, you can walk through the autodiscovery from HomeAssistant. You should see something like this and be able to control your curtains via HomeAssistant.
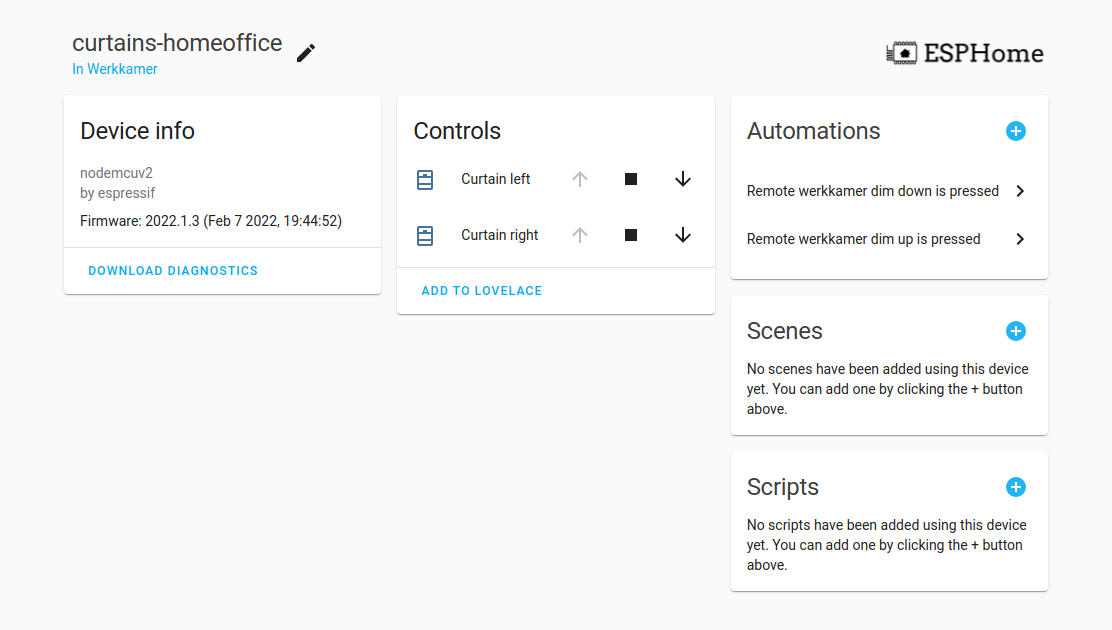
So you can interact with it like you would with any regular HomeAssistant integration.
Conclusion time
It’s not the fastest curtains out there. This setup currently takes about ~ 2 minutes to fully roll down, but there are ways to improve this. You could tweak the max_speed value in the ESPHome setup or go with the 28BYJ-48 12-volt version (I am currently using the 5 volts version).
But for an initial setup, it works. But expect some improvements over time ;-)
Done!
I hope you found this guide useful! If you have any feedback or questions, you can hit me up on Twitter. Thank you for reading and until next time :)