Categories:
For about a year, a year and a half I’ve been running Home Assistant. First as a small little experiment I was running it on one of my Raspberry Pi’s 3s. With a small selection of smart appliances. Initially I was running it with a small set of Philips Hue bulbs and a AM2302 temperature and humidity sensor. Which was a great stepping stone into home automation. Based on the time of day and other inputs like sunrise and sunset, you can do allot of fun stuff.
As times passed, my poor little Raspberry Pi running Raspbian was running against it’s limits. I’ve been adding presence detection (using the OpenWRT component), added scenes, added Kodi (and later removed it) media playback, ChromeCast etc. etc. etc. Eventually I want to make my fan controllable by Home Assistant, detect wether doors and/or windows are opened and other shenanigans like this, but I digress. My Pi was running against it’s limits, so I eventually decided to move my Home Assistant installation to a freshly build home-server.
However, because I moved my Home Assistant installation using Docker. That meant I couldn’t easily access the GPIO pins on my Pi anymore and thus I lost direct access to my AM2302 temperature sensor. So I had think of another way around this and I eventually choose for a setup where I had a MQTT service running inside of Docker https://hub.docker.com/_/eclipse-mosquitto where I could push data regularly to and not to make anything to over complicated.
In my case I made a simple bash script that depends on modified version of one of the Adafruit DHT library examples and uses the mosquitto-clients Debian package.
First let me show you the modification I applied to the adafruit-dht.py script, this will make integrating it with Home Assistant a lot easier. Since I really didn’t want to deal with any type of regular expressions in the Home Assistant configuration, I decided to have the adafruit-dht.py script return JSON instead of the string with some text and some numbers.
Before we can do anything, we need install PIP and the necessary supporting libraries.
sudo apt-get update
sudo apt-get install python-pip
sudo python -m pip install --upgrade pip setuptools wheel

sudo pip install Adafruit_DHT
First we need to import the JSON module in Python,
import json
Once that’s done, we can continue on to the output of the actual script. All this really does is output the values measured by the AM2302 in a JSON format.
if humidity is not None and temperature is not None:
    print json.dumps( {"temperature": round(temperature, 2), "humidity": round(humidity, 2 ) } )
#    print('Temp={0:0.1f}*  Humidity={1:0.1f}%'.format(temperature, humidity))
else:
    print('Failed to get reading. Try again!')
    sys.exit(1)
Example output of this script will be something like:
{"temperature": 22.2, "humidity": 35.0}
Full source of my modified adafruit-dht.py is available on https://gitlab.com/snippets/1872740.
Once we have changed this, we can then move on to building the script that will read the values our AM2032 sensor and push them to the MQTT server.
#!/bin/bash
set -e
CT=$(python /root/tools/temp-sense/adafruit-dht.py 2302 4)
MQTT_HOST=10.0.0.1
MQTT_PORT=1833

mosquitto_pub -h $MQTT_HOST -p $MQTT_PORT -t "home/room/sensor1" -m "$CT"
This script works on the following basis. We call our python script adafruit-dht.py directly with 2 parameters. The first parameter is the sensor type we use. In my case it’s 2302, other options available are 11 (for the DHT11) and 22 (for the DHT22).
The second parameter is meant to which GPIO pin the datapin of the DHT11, DHT22 or AM2302 is connected to the Raspberry Pi. In my case I used GPIO pin 4.
We can then use the output of the adafruit-dht.py script and feed that into a -m parameter. The -t parameter is used to specify to which topic you want to push the message to. The topic can be anything you want it to be, but keep in mind that it needs to be the same everywhere.
When you want to use this script yourself, please update the MQTT_HOST and MQTT_PORT to match your own situation.
Once we everything has been setup properly, we can use a tool like MQTTBox (available for Linux, Windows and Mac) to connect to the MQTT server and subscribe to this topic and verify what gets pushed towards the MQTT server.
If everything went according to plan, you should see something similar to this; 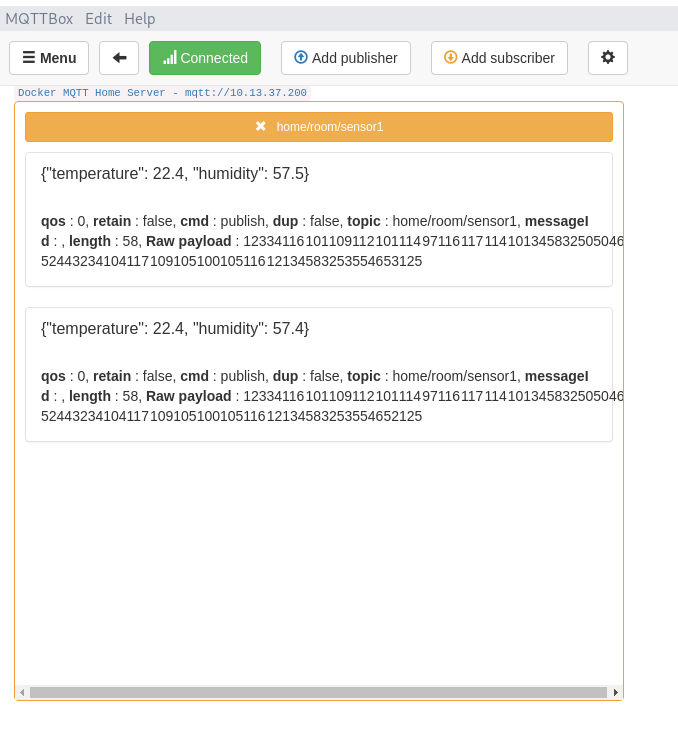
Now that everything works as it should be, we can set it up as a cronjob on our Raspberry Pi and start integrating with Home Assistant.
* * * * * ~/tools/temp-sens/push-temp-mqtt.sh
I’ve decided to run this script every minute, but you can change it to whatever you prefer. Every 5 minutes, every hour. The reason I wanted to run it every minute is because I want the most up to date values and because I will be relying on the up to date-ness of the values in the future. Fun little fact; if you push the same value again to the MQTT server, it will ignore it the second time.
Now that this is in working conditions, all we need to do add the following snippet to the configuration.yaml in Home Assistant and call it a day.
sensor:
  - platform: mqtt
    name: "Temperature"
    state_topic: "home/room/sensor1"
    unit_of_measurement: '°C'
    value_template: "{{ value_json.temperature }}"
  - platform: mqtt
    name: "Humidity"
    state_topic: "home/room/sensor1"
    unit_of_measurement: '%'
    value_template: "{{ value_json.humidity }}"
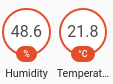
This snippet defines two sensors within Home Assistant called Temperature and Humidity, they are using the platform MQTT and need some form of JSON parsing. The unit_of_measurement values are just a way of neatly showing the values in the Home Assistant web interface (either Lovelace or the ‘states’ UI).
Once we reloaded (or restarted) Home Assistant we should be seeing the following sensors in the interface.
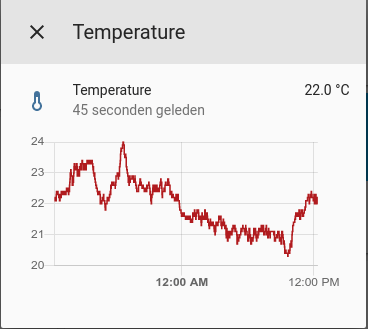
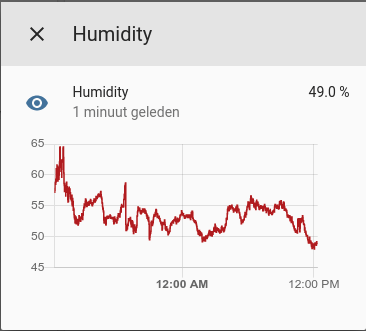
Now we dive into the temperature and humidity sensor and inspect our temperatures and humidity.
This approach has been running stable in my environment for the last ~2.5 months and has been tested on a Raspberry Pi 3B (not the B+) and on a Raspberry Pi Zero W.
I hope you learned a few things by my ramblings ;-) Especially on how to integrate a DIY temperature and humidity sensor with your Home Assistant setup with some decent of reliability. If you like to learn more about MQTT and it’s inner workings. Random Nerd Tutorials has an excellent article on how MQTT works. You can also modify this whole setup to fit your own setup. So for example; have one Raspberry Pi 3(B/B+) to be the host for Home Assistant and MQTT and a Raspberry Pi Zero W to be the sensor. Or have an ESP32 or a ESP8266 to be the sensor. The possibilities with MQTT are pretty much endless.